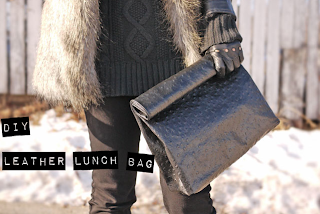
MATERIALS:
- leather mine is the ostrich grain embossed leather split the print adds an interesting detail and the leather is quite stiff which helps maintain the shape
- 100% polyester thread (cotton thread can disintegrate with the tanning chemicals)
- sewing machine that can take the abuse of sewing with leather
- super glue
DIRECTIONS:
DIY
1. Cut 2x bottom pieces 16"x 2.5", 2x top pieces 16"x 22" (this is including 0.5" seam allowance)
2. Sew the bottom pieces to each top piece (to create what I will call the "bottom seam")
3. Press the bottom seam to make it flat
4. Leather sides facing together, sew the sides (to create what I will call the "side seams"). Then flip it inside out
5. To create that paper bag shape, fold in the side seams 2" deep
6. You can press down the fold with your hands or iron with a piece of cloth over the leather
You'll be closing the bottom like you would wrap a gift box. From this point on, you'll be working below the bottom seam.
7. Start by drawing lines extending from the folds you just created.
8. Fold in the bottom sides by matching the lines you just drew to the inside of the bottom seam. press down.
9. draw a line 2" from the bottom seam
10. flip the bag inside out and sew the bottom edge together along the line you just drew
11. flip it inside out again and super glue the open edges of the bottom together, matching up the seams
12. let the glue dry and admire your handy work.
Word to Project22
It's a wrap... no pun, i NEEEEEEED this baggy! lol


